Post by Knoll on Aug 17, 2007 13:31:59 GMT -5
Ok! I decided to write a tutorial!
Ok!
Step one!
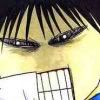
The first step is to paste a render onto a blank Canvas, with a transperant background! Like So
For this, I used Rai-san! And I put him on a canvas that's 400x150
Step Two
Ok, Next, we are going to add a color, or a gradiant to the background, just to get things started. Do that by creating a new layer, then either fill it with a color of your choice, or use a gradiant of your choice, and place the gradiant/Color layer beneath your render.
Result
Layer Window
Step Three
Ok! In this next step, you need to duplicate the render twice, then place one of the copies underneath your gradiant layer for later.
Layers
Now, with your duplicated layers, hide the top layer, and take out the smudge tool. Smudge the first copy of your render with whatever brushes you like. Normally you smudge with something with texture, but with a hard circle brush you'll get an effect similiar to mine.
Smudge with these settings:
One
Two
Result
Step four
Ok! Now we must add some C4Ds, these are abstract 3D figures that are used to add textures. In this case I used a round circular one. Place the C4D just underneath your render, but over the layer that you smudged out.
Result
Step Five
Now, we start using filters, start by making a new layer, and under Image, Apply Image so that all of the layers are merged onto a new one. Now are first filter goes Filer>> Brush Strokes>> Spatter. Now, do what you like here, but don't make it all messed up, keep it light. Now, on that layer, set it's blending Mode to Lighten, Lower the Opacity to 75%, and erase parts of the render you want to stand out, like the face, or some part of the body.
Result
Step Six
Now make a new layer, and Apply the Image again. Then Filter>> Distort>> Ripple.
My Settings
With this done, erase the same spots you did in step 5, in order to clear up the signature a bit, then set the layer to Lighten.
Result
Stage Seven
Now, Apply the Image again, and add another filter Filter>> Blur>> Motion Blur. Like before, erase the parts that you want to stand out more, and set the mode to Lighten.
Result
Step Eight
Now, add another C4D, One that's more Fluid, and one solid item, not the orb we used before. This C4D Should be many colors, and dark. Move it to a spot you think looks good with your sig, and set the Blending Mode to Linear Dodge, and bring the Opacity down to 83%. Also, Feel free to erase anything that looks bad.
Result
C4D Used
Step Nine
Next, we add some Gradient Maps. Layer>> New Adjustment Later>> Gradient Maps. First, use a Black, and White Gradient Map, and set it's blending Mode to Luminosity. Then add another one, the Violet, and Orange Map. Set that to Overlay at 50% Opacity Add a last one of any gradient you chose. Set it to overlay at 70%
Step Ten
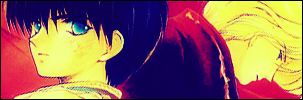
Now, Bring the very first render, the one underneath the gradient at the very beginning, and take it to the very top of the layers, above everything, even the gradient Maps. Set it to Hardlight at 51 %
Lookie Here
Step Eleven
Now, add a text, and a border, then your done!

Credits:
Render Used: Rai From Lamento Beyond The Void
C4Ds: Here
Ok!
Step one!
The first step is to paste a render onto a blank Canvas, with a transperant background! Like So
For this, I used Rai-san! And I put him on a canvas that's 400x150
Step Two
Ok, Next, we are going to add a color, or a gradiant to the background, just to get things started. Do that by creating a new layer, then either fill it with a color of your choice, or use a gradiant of your choice, and place the gradiant/Color layer beneath your render.
Result
Layer Window
Step Three
Ok! In this next step, you need to duplicate the render twice, then place one of the copies underneath your gradiant layer for later.
Layers
Now, with your duplicated layers, hide the top layer, and take out the smudge tool. Smudge the first copy of your render with whatever brushes you like. Normally you smudge with something with texture, but with a hard circle brush you'll get an effect similiar to mine.
Smudge with these settings:
One
Two
Result
Step four
Ok! Now we must add some C4Ds, these are abstract 3D figures that are used to add textures. In this case I used a round circular one. Place the C4D just underneath your render, but over the layer that you smudged out.
Result
Step Five
Now, we start using filters, start by making a new layer, and under Image, Apply Image so that all of the layers are merged onto a new one. Now are first filter goes Filer>> Brush Strokes>> Spatter. Now, do what you like here, but don't make it all messed up, keep it light. Now, on that layer, set it's blending Mode to Lighten, Lower the Opacity to 75%, and erase parts of the render you want to stand out, like the face, or some part of the body.
Result
Step Six
Now make a new layer, and Apply the Image again. Then Filter>> Distort>> Ripple.
My Settings
With this done, erase the same spots you did in step 5, in order to clear up the signature a bit, then set the layer to Lighten.
Result
Stage Seven
Now, Apply the Image again, and add another filter Filter>> Blur>> Motion Blur. Like before, erase the parts that you want to stand out more, and set the mode to Lighten.
Result
Step Eight
Now, add another C4D, One that's more Fluid, and one solid item, not the orb we used before. This C4D Should be many colors, and dark. Move it to a spot you think looks good with your sig, and set the Blending Mode to Linear Dodge, and bring the Opacity down to 83%. Also, Feel free to erase anything that looks bad.
Result
C4D Used
Step Nine
Next, we add some Gradient Maps. Layer>> New Adjustment Later>> Gradient Maps. First, use a Black, and White Gradient Map, and set it's blending Mode to Luminosity. Then add another one, the Violet, and Orange Map. Set that to Overlay at 50% Opacity Add a last one of any gradient you chose. Set it to overlay at 70%
Step Ten
Now, Bring the very first render, the one underneath the gradient at the very beginning, and take it to the very top of the layers, above everything, even the gradient Maps. Set it to Hardlight at 51 %
Lookie Here
Step Eleven
Now, add a text, and a border, then your done!
Credits:
Render Used: Rai From Lamento Beyond The Void
C4Ds: Here